You may have run into this too: you bought brine shrimp eggs, mixed up the saltwater, turned on the air pump, kept a light on—yet after half a day or even a full day, nothing happens. Then you start wondering, “Are the eggs bad?” or worrying that repeated failures are wasting money and time.
If you’re using decapsulated (shell-free) brine shrimp eggs, and your water quality, temperature, and aeration are all on point, you can usually see hatching within 24–36 hours. Many people also find they’re easier to hatch than regular cysts, because the nauplii don’t need to fight through a hard shell. The energy they save can go into a smoother hatch, and under the same conditions, the success rate is often better.
I’ll explain three things as clearly as possible:
Why are decapsulated eggs easier to hatch?
How do you hatch them consistently?
Which is more cost-effective: decapsulated eggs or regular eggs?
I’ll also break down the most common beginner mistakes (eggs sinking, not enough oxygen, unstable temperature, etc.) so you can avoid the usual detours.
Chapter 1: What Exactly Are Decapsulated Brine Shrimp Eggs?
Decapsulated brine shrimp eggs are also called shell-free eggs / E-Z eggs. In simple terms: it’s not a “different strain.” It’s regular brine shrimp cysts with the outer hard shell removed, while the “baby shrimp” embryo inside is still there—only protected by a thinner membrane.
Why is it called “decapsulated”?
Because the hard shell is removed using a chlorine-based solution for a short time. This usually brings three benefits:
Less hassle: after hatching, you won’t have a pile of shells to separate, so collecting nauplii is easier.
Cleaner: the process can make the egg surface more “sanitary,” lowering the risk of introducing contaminants into your tank.
More flexible: some decapsulated eggs can even be fed without hatching (no hard shell, easier to ingest).
Decapsulated vs. regular eggs: what differences matter most?
Think of it as a quick “before you buy” comparison:
Appearance & handling
Regular eggs: have a hard shell; after hatching you’ll have shells and unhatched eggs left behind.
Decapsulated eggs: shells are removed in advance, so you basically skip the “shell separation” step later.
Feeding & water quality
Regular eggs: if shells and debris aren’t cleaned out well, the water can foul more easily.
Decapsulated eggs: with no shell residue, many sellers and breeders emphasize they’re easier to handle—good for direct feeding or for reducing leftover debris.
Hatching method (often overlooked by beginners)
Regular eggs: most common hatchers work fine.
Decapsulated eggs: they sink more easily, so you need strong bottom-up aeration to keep eggs circulating. The container should ideally have smooth inner walls and not too many angled edges where eggs can stick (better with strong bottom aeration + a smoother vessel).
One-sentence summary:
Decapsulated eggs help you avoid shell-related headaches (easier separation, more flexible feeding, generally easier to manage), but because they tend to sink, aeration and container details matter more during hatching.
Chapter 2: Why Can Decapsulated Brine Shrimp Eggs Hatch?
1) First, clear up the biggest worry: “decapsulated” ≠ “killed”
Decapsulation simply removes the outer shell—the embryo inside is still there.
So it’s not “processed and no longer viable.” If anything, it’s like someone helped you clear the hardest obstacle in advance. With the shell gone, hatching can be easier.
2) Why do many people feel they succeed more often? Two core reasons: less effort + cleaner
Less effort: nauplii don’t need to spend energy cracking a hard shell, which can improve success.
Cleaner: the process makes the egg surface “more sanitary,” reducing contaminants in the hatch water—and you also avoid the hassle of separating empty shells.
3) How big is the success-rate difference?
Under the same temperature, salinity, and aeration, decapsulated eggs often show ~75%–90% hatch performance, while regular eggs are commonly around ~55%–62.5% (batch-to-batch variation exists, but the trend is clear). That’s why people who want “consistent daily hatches” often prefer decapsulated eggs.
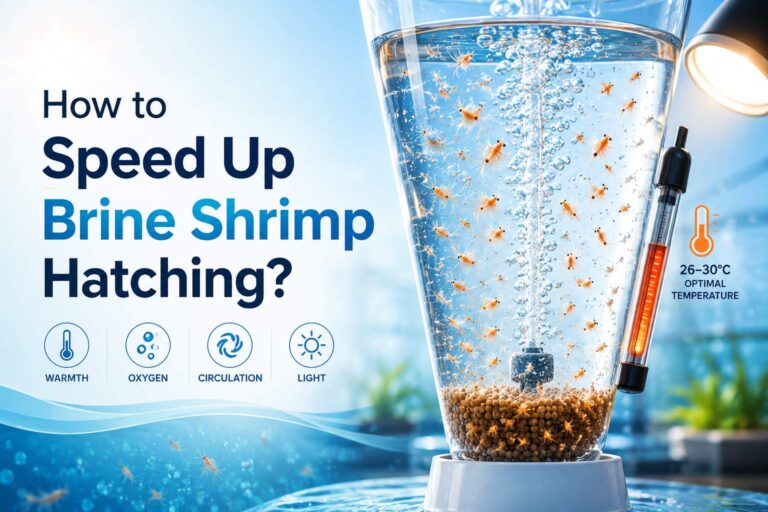
4) Why can they hatch faster? Temperature is the key
Decapsulated eggs usually hatch within 24–36 hours.
If you want hatching closer to 24 hours, the water temperature is typically 26–28°C (about 80–82°F). Cooler temperatures can noticeably slow things down.
Chapter 3: Step-by-Step Guide to Hatching Decapsulated Brine Shrimp Eggs
Goal: stable, repeatable batches—something you can run every day.
Workflow: mix water → add eggs → control temperature & aeration → separate & collect → feed/store
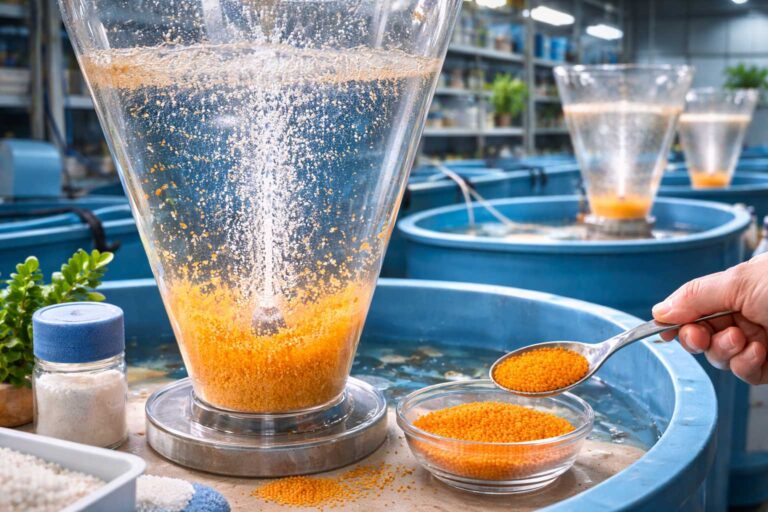
Step 1 | System setup
Hatching container / cone: prioritize a cone-shaped hatcher or a container with a bottom drain/outlet (bottom air + bottom drain). This helps prevent eggs from collecting in corners and makes harvesting faster.
Central aeration: air from the bottom creates continuous circulation. Two goals: no sinking + no oxygen shortage.
Temperature control: use a heater/thermostat to keep temperature stable (unstable temperature is the #1 reason batch hatches fail).
Light: steady light is enough—don’t chase “perfect parameters,” chase consistency.
In batch hatching, it’s not fancy gear that matters. It’s whether you can keep oxygen, temperature, and salinity stable every day.
Step 2 | Mix saltwater
Salinity: lock in a beginner-safe range: 20–25 ppt. Don’t test the edges at first—stability first.
Temperature: set your target at 26–28°C; you’ll see tighter, more synchronized hatching (easier to schedule).
Water source: don’t use “fresh tap water straight from the faucet.” Batch runs hate unpredictable water. Use a consistent source or treat/condition it first.
Step 3 | Add eggs
Stocking density: start at 0.5–1 g/L to validate your process. If you want more output, first confirm: “oxygen can keep up, eggs don’t clump, no bottom buildup,” then increase density gradually.
How to add: sprinkle evenly while aeration is running—don’t dump a clump that sinks to the bottom.
Step 4 | Control during hatching
Aeration intensity: judge by whether eggs stay suspended and rolling. If eggs stick to the wall or pile at the bottom, aeration is too weak or the air point is poorly placed.
Temperature stability: keep it in range—avoid big swings.
Timing: usually 24–36 hours. The more stable the temperature and the stronger the oxygenation, the more “concentrated” the hatch window.
Step 5 | Separate and harvest
You want this to be fast, clean, and repeatable. A common two-step approach:
Stop air for 5–10 minutes: let layers form so harvesting is quicker.
Filter and collect: use a brine shrimp net / sieve / filter bag to catch nauplii, then rinse quickly with clean water, and feed immediately or store briefly.
For batch operations, it’s not recommended to pour the whole salty hatch water into your fry tank. Control how much brine enters the tank—water quality stays steadier and you’ll have fewer issues.
Batch-hatching pitfalls (the 4 most common)
Not enough oxygen: eggs sink or clump = hatch rate drops immediately. Fix oxygen first before raising density.
Temperature swings: hot days/cold nights = scattered hatching, harder harvesting, higher mortality.
Overloading eggs: aiming for “more” often leads to “less.” Nail 0.5–1 g/L first, then scale.
Unstable water source: in batch work, make your water source a controlled variable—don’t let it change randomly every day.
Chapter 4: Feed Directly vs. Feed After Hatching? One Table to Decide
Conclusion first: decapsulated eggs can be used both ways—direct feeding (no hatch) or hatch first, then feed.
Quick comparison (based on real situations)
| Your situation | Feed decapsulated eggs directly (no hatch) | Feed after hatching (nauplii) |
|---|---|---|
| Who it suits | adult fish, strong appetite, you want convenience; or as an “extra snack” | fry/larvae, picky fish, need moving food to trigger feeding response |
| Will fish eat it? | some will, but it doesn’t move—picky fish may ignore it | easier to chase and eat (it swims) |
| Time-saving? | fastest: soak briefly and feed (no 24–48h wait) | more time: wait for hatch + collect/filter |
| Nutrition & “value feeling” | common view: less “hatching loss,” feels more “solid” | live food stimulates feeding; if you enrich it, the ceiling is higher (more steps too) |
| Impact on water quality | depends on amount: leftovers foul water; some sellers/hobbyists warn it may be more prone to bacterial issues—feed small and remove leftovers promptly | easier to control: filter nauplii before feeding, less brine and debris enters the tank |
| Good for “lazy mode”? | ✅ yes, but remember “small amounts, multiple times, remove leftovers immediately” | ❌ more like a “stable hatch workflow,” for people who prioritize results |
Two “no-brainer rules”
Raising fry / need to trigger first feeding / fish are picky → choose hatch first (moving food works better).
Raising adult fish / you just want convenience → you can feed decapsulated eggs directly, but do this: small amount, watch them eat, remove leftovers immediately, or the water will foul quickly.

Chapter 5: Common Misunderstandings + Ultimate Q&A (Avoid Buying Wrong / Using Wrong)
Myth 1: “Decapsulated eggs are dead, only usable as powdered feed”
Not true. “Decapsulated” only means the outer shell is removed. If handled properly, the embryo inside is still alive and can hatch. UF/IFAS materials also state that decapsulated eggs can be hatched directly.
Key point: the market does include “non-hatching decapsulated eggs.” If temperature control fails during decapsulation (e.g., the reaction overheats), the embryo can be “heat-damaged,” leaving a product that can only be fed directly.
How to tell at a glance: check whether the packaging/page says non-hatching, or clearly states it can hatch.
Myth 2: “Decapsulated eggs must be frozen, or room temperature will ruin them”
A more accurate statement: keep them cool, dry, and away from light, and especially avoid moisture.
Dry brine shrimp eggs: if kept dry, they can store for a long time (some references mention “months or even years” may be possible).
Decapsulated eggs stored in high-salinity (saturated brine): UF/IFAS suggests refrigeration, and they may store up to about 2 months before hatching.
Some sellers recommend a more conservative approach (refrigerate and use ASAP, e.g., within 3–4 months).
High-frequency Q&A
Q1: What if my hatch rate is under 70%?
Troubleshoot in this order (beginners usually get stuck on these):
Chloramine/disinfectants in the water: some references warn chloramine can make hatching difficult. Using purified water or a dechlorinator (ideally one that also handles chloramine) is more stable.
Wrong temperature: for efficient hatching, common advice is 26–28°C. Too low = very slow; above 30°C can reduce success.
Not enough aeration / eggs sink: you need continuous aeration to keep eggs suspended and rolling; references also emphasize sufficient oxygen during incubation (some even provide minimum dissolved oxygen suggestions).
Too many eggs: high density leads to low oxygen and clumping; many guides warn “don’t be greedy.”
Old eggs / poor storage: moisture, repeated opening, high-temperature storage—these all reduce viability (hence the “refrigerate and use quickly” advice).
Q2: My nauplii look reddish/pink—are they dead?
Not necessarily. Many references note that when oxygen is low, brine shrimp can appear “redder” (a biological response to low oxygen).
Try this (often works immediately):
Increase aeration (fix oxygen first).
Bring temperature back to 26–28°C and avoid going above 30°C (higher temperature makes it harder for water to hold oxygen).
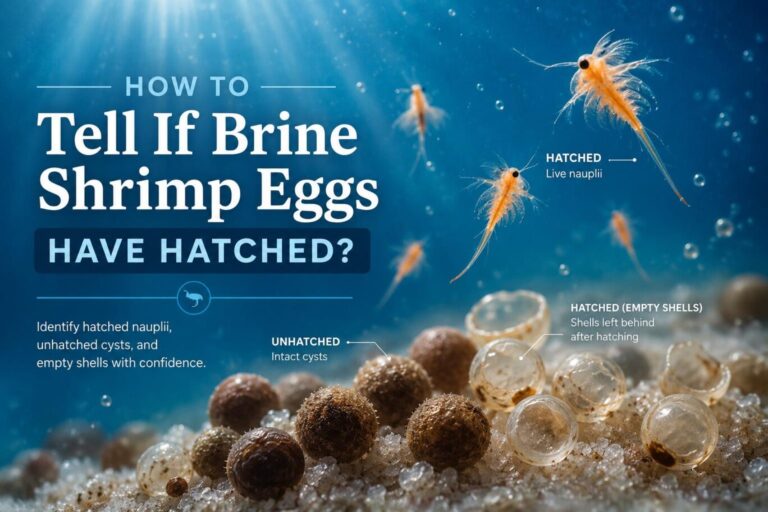
FAQ
Do decapsulated brine shrimp eggs hatch?
Yes—decapsulated (shell-free) brine shrimp eggs can hatch, because decapsulation removes only the hard shell, not the embryo inside. If temperature, salinity, and aeration are right, they typically hatch within 24–48 hours.
How long will it take for brine shrimp eggs to hatch?
In this setup, you should expect hatching in 24–48 hours. If you want hatching closer to 24 hours, keep the water at 26–28°C (80–82°F) with strong aeration and stable conditions.
Can brine shrimp hatch in 12 hours?
Usually no—with the conditions described here, the normal window is 24–48 hours. If nothing happens in 12 hours, that’s not automatically a failure.
How to hatch decap artemia?
Use a simple “stable batch” workflow:
Mix saltwater at 20–25 ppt
Heat to 26–28°C (keep temperature stable)
Start strong bottom-up aeration (keep eggs suspended/rolling—don’t let them sink or clump)
Add eggs evenly while aeration is running (avoid dumping a clump)
Wait 24–48 hours
Stop air 5–10 minutes, then filter/collect, rinse, and feed
Can brine shrimp hatch without aeration?
Not reliably. Decapsulated eggs sink more easily, and you need strong aeration to (1) keep eggs suspended and (2) prevent oxygen shortage. Weak/no aeration often leads to sinking/clumping and poor hatch.
Why won't my brine shrimp eggs hatch?
Most “no hatch” cases come down to one (or more) of these:
Not enough aeration → eggs sink/clump = hatch rate drops fast
Temperature issues → too low slows hatching; big swings reduce success (aim 26–28°C, avoid going above 30°C)
Too many eggs (overloading) → oxygen can’t keep up
Unstable water source → batch hatching hates unpredictable water (don’t use fresh tap water straight from the faucet)
A quick fix order: oxygen first, then temperature stability, then reduce egg density, then improve water consistency.
What can affect brine shrimp hatching?
The big four are:
Oxygen/aeration strength (keep eggs suspended and well-oxygenated)
Temperature (best results around 26–28°C, stable)
Salinity (start at 20–25 ppt for consistency)
Egg density (too dense = low oxygen + clumping)
What is the best salinity for brine shrimp to hatch?
A reliable beginner-safe range is 20–25 ppt. Don’t push extremes early—stability beats “perfect numbers.”
What temperature to hatch brine shrimp eggs?
Target 26–28°C (80–82°F) for faster, more consistent hatching. Try to avoid big temperature swings, and avoid pushing above 30°C, which can reduce success.
How to make brine shrimp hatch faster?
You can’t “force” instant hatching, but you can tighten the hatch window:
Keep temperature at 26–28°C (stable)
Use strong aeration so eggs stay suspended and oxygen stays high
Don’t overload eggs (start 0.5–1 g/L)
Keep salinity steady (20–25 ppt) and use consistent water
How to increase brine shrimp hatch rate?
Use this checklist:
Stronger aeration (eggs should be rolling, not stuck to walls or piled at the bottom)
Stable temperature (26–28°C, avoid big swings)
Lower density first (prove the system at 0.5–1 g/L, then scale)
Consistent water source (avoid unpredictable “straight tap” in batch runs)
Can fish eat decapsulated brine shrimp eggs?
Yes—some decapsulated eggs can be fed without hatching (no hard shell). It’s most suitable for adult fish or when you want convenience. Feed small amounts, watch them eat, and remove leftovers quickly to avoid fouling the water.
Can fish eat decapsulated brine shrimp eggs?
Sometimes they still can, but hatch rate usually drops with age and poor storage (moisture, heat, repeated opening). If your hatch rate suddenly tanks, old eggs/storage issues are one of the first things to suspect.